Showing posts with label scrapping for tranquility. Show all posts

Monday, April 15, 2024

Summer BBQ

Hello 12 x 12 Cardstock Shop Fans!  Christi here from Scrapping For Tranquility with another fun collaboration with Dreaming Tree.

This month I decided to use a couple of their free files so you get to see what I did with them and you get to download them for free also and do something fun also!  Here is what I made!


Watermelon Snack Bowl and Watermelon Card. These are not a pair but separate SVG files and I thought what a cute set to put together!  I am making the watermelon cards my Memorial day BBQ invites!  On the table I am going to have the little watermelon bowl.  I just loved the summer feel of these and when I stuffed the bowl with strawberry candies it set it over the top!  Just an FYI, one regular bag of the strawberry candies fit into the bowl!  Oh, we can't not mention that envelope!  It is soooo stinking cute!

Well of course I used all 12 X 12 Cardstock Shop Supplies!

American Crafts Taffy

American Crafts Grass

American Crafts Precision Black

American Crafts Precision White

DoodleBug Candy Stripe Sprinkles Rainbow


Let's take one last look at my project.  Give yourself  some inspiration to put on that fun Summer party this year with these cute party decor or just make the card to brighten someone's day!

While I am here I want to know if you have have any run off glue on your projects?  You know....lets say , the project I just made I was putting the seeds on and got too much glue on the back of the seed and when I put it on all this glue came gushing out!  UGH!  I really hate that! There isn't much you could do but just hope it doesn't show up when it dries.  BUT........There is something you can do!


Here is a spot of glue on my cardstock.  I am going to let it dry.


Taking ONLY white pencil eraser, like these I bought at Hobby Lobby.  I keep one on the end of my pokey tool.


You are going to gently erase away your glue, once it dries.  If you  rub too hard you will wear your cardstock away.  hahaha


Here is my cardstock without glue on it after I "erased it."  

I hope that gives you a little help with your papercrafting.

Until Next Month,


Christi


Sunday, February 18, 2024

TV Watching

Good Morning PPC Fans!  Christi here from Scrapping For Tranquility.  
I want to share a layout of my youngest grandson, Lachlan, when he was just over a year old, watching his favorite Educational programs.  He so loved those shows.


If I allowed him to, he could stand in one place for hours .  LOL  Finally I got him to sit down by lowering him manually to the ground.  LOL

When I noticed he was in the onsie t-shirt, I just had to make the Sweet Baby Boy Banner Set.  It is also Onsie t-shirts and comes in a girl version also.  I just thought this was the cutest thing!  I decided to go with the pastels of baby colors since , in my eyes, he was still a baby at just over a year.


Next using the Baby Blocks Capital Alphabet Set & the Baby Blocks Lowercase Alphabet Set, I spelled his name out on the side.  

Under my photos I made a doily set from Miss Kate Cuttables.

Here is a 2nd look at my project completed:


I enjoy making layouts for all my family and Printable Cuttable Creatables helps me do just that by supply my paper piecing in all my needs.  Come take a look!

The Files I used from Printable Cuttable Creatables are as follows:


Leave me a message and let me know what you think or if you have any questions.  I will be happy to get back to you!

Blessings,


Thursday, September 20, 2018

Stamperia/Ranger Pillar Candle Sticks /September Guest Designer for Fotobella.com

  Hello!  Here with my 3rd post, as Fotobella.com's  Guest Designer for September .

When I received my GDT box I received a Wood Effect Stencil by Stamperia, a Lucky Clover Ranger Distress Spray Stain and some Brown Prima Wire Thread.  These were three items I kept thinking,  What the heck am I going to do with these?  I kept racking my brain and here is what I came up with!  Enjoy!

SUPPLIES:


Picket Fence Distress Spray Stain


Tools:


Cutting Machine of your Choice along 
with SVG file  to cut the pieces

Pallet Knife

Heat Gun


Quilling tool and/or pencil


Cut all your Pillar Pieces for the pillar on your cutting machine of choice.  I bought this particular file from My Scrap Chick.


      Place the Stamperia Wood effect Stencil on the Brown Cardstock panels for the pillars.
Apply the Texture Paste with the pallet knives.


Gently pull from one corner of the stencil up and off the cardstock to reveal what the texture paste  left on the cardstock


Using your heat gun, dry the texture past and watch it raise a bit to give you the “texture”.  


 Using a box for a “spray room” to catch your  over spray,  lay your panels in the box.  Lightly spray Ranger Distress Spray Stain, Lucky Clover.


Again, using your heat gun, dry the distress stain until completely dry.


  Once your Ranger Distress Spray Stain, Lucky Clover is completely dry, it is time to lay the  panels out in your spray box to put a spray layer of Rangers  Distress Spray Stain, Picket Fence. 


     Taking the heat gun, completely dry the Picket fence layer.   
Once it is dry, determine if you need another layer of picket fence.  If you do, repeat steps 8 & 9. 


Repeat all steps above on the top and bottom of the pillar and then fold on perforated lines.  


Glue the top and bottom parts to form the “box–like “ forms. 


Glue the base of the pillar together 


Glue the wood panels that you textured and stained onto the base of the pillar.


Placing glue on the tabs on the bottom of the pillar, place the pillar into the bottom square you made.  


Placing glue on the top tabs of the pillar, place the top square you built onto the pillar. 


Using Prima Wire Thread, bend it around the pillar for a “3 D VINE effect” around your “tree”.


Finally, adding leaves from the Bo Bunny Foliage Laser Cut Chipboard .I top it off with taking my quilling tool and wrapping the Brown Wire Thread by Prima around it to make it look more like curled vine.

Let's
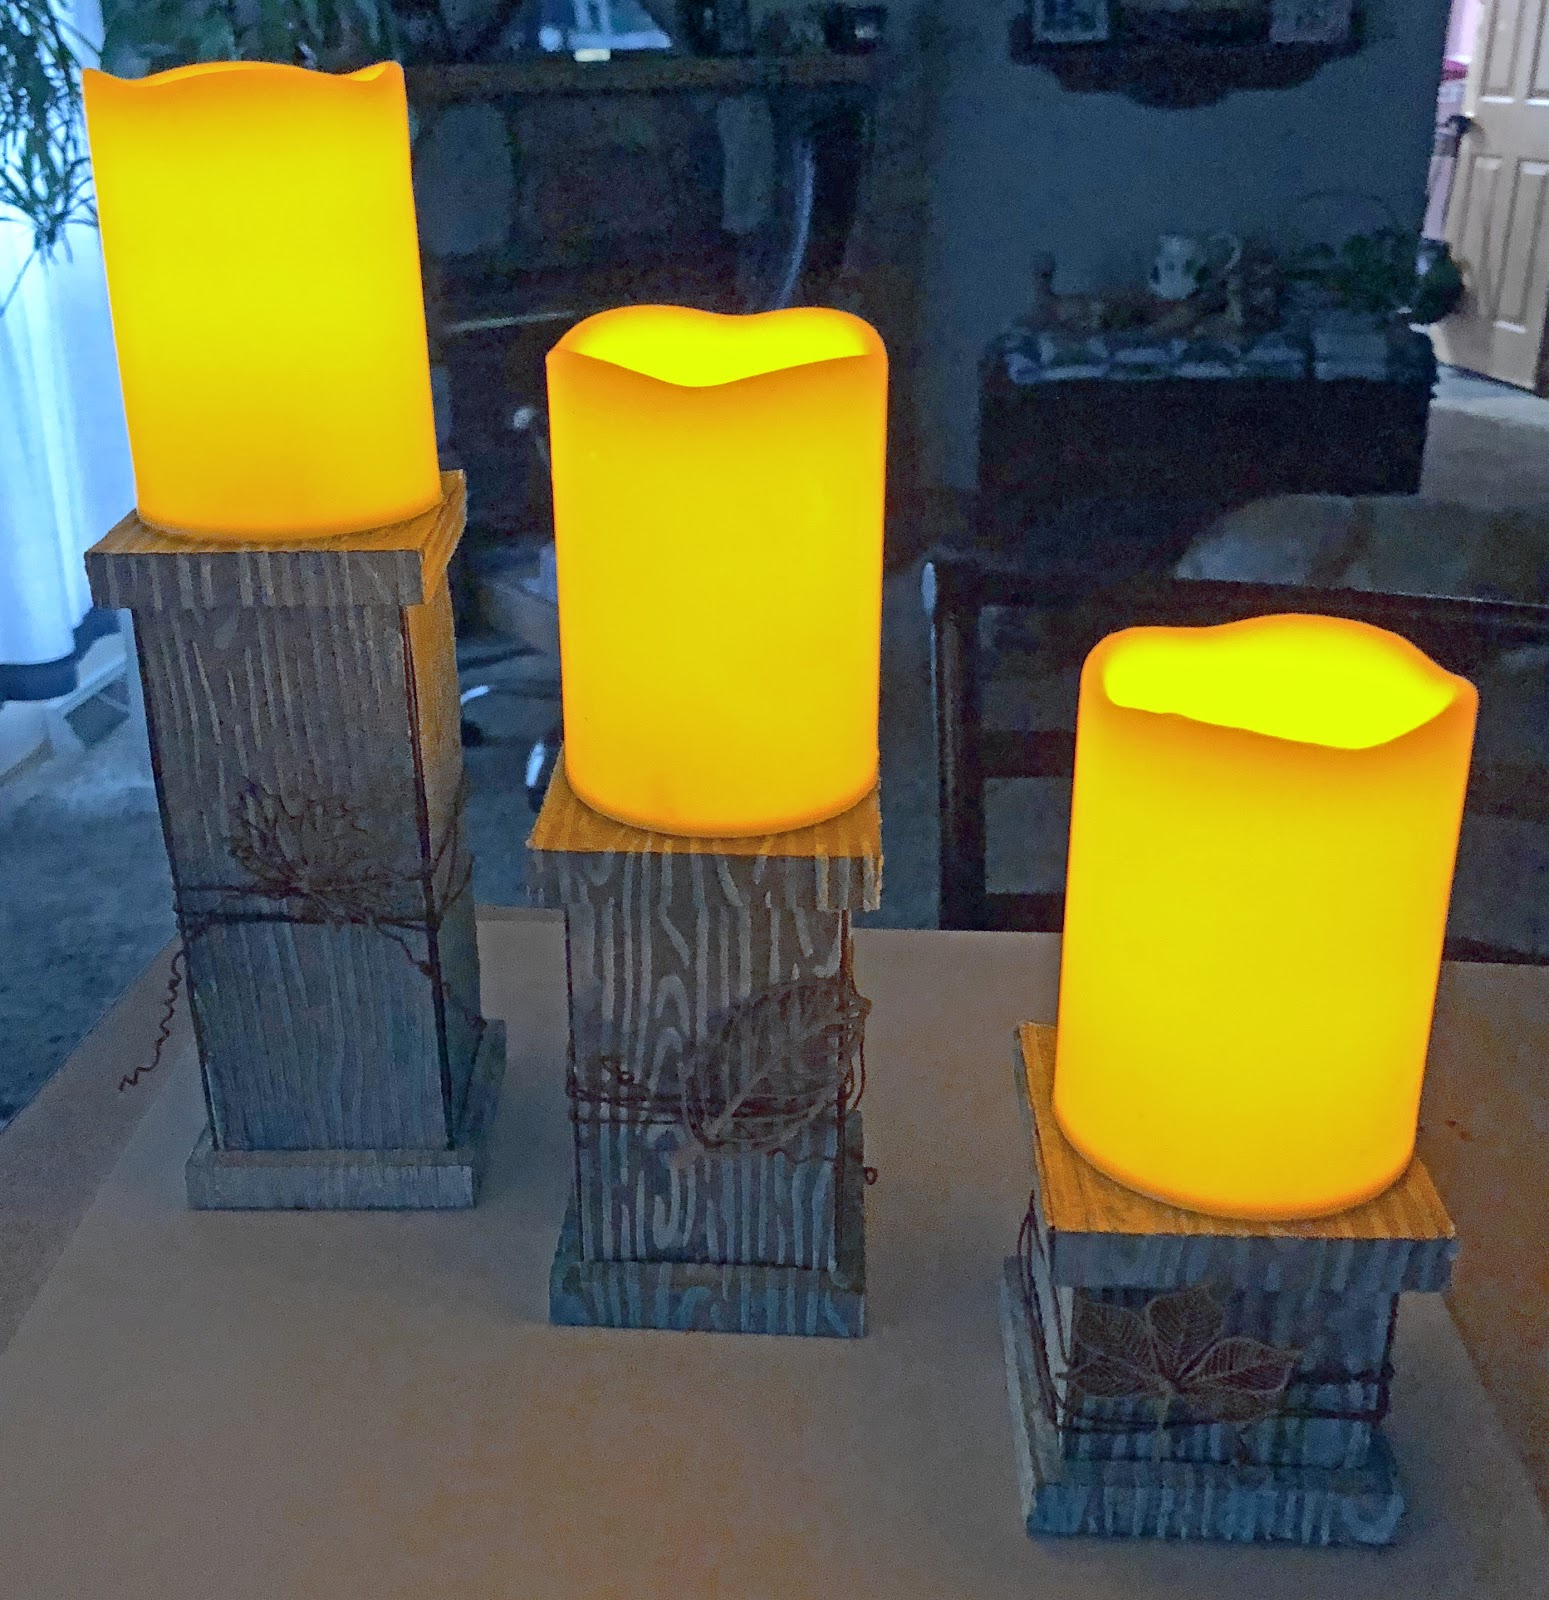
 take a look at the the finished products:


I added battery operated candles from Dollar tree.

Here is they are in the light:


I REALLY love the way this project came out.  Let me know what you think by leaving me a comment below!

Blessings,


Monday, October 3, 2016

Guest DT For Connie Can Crop

Christi Here from Scrapping For Tranquility.  When Connie asked me to be a Guest DT I was sooooo Honored you would not believe!  She had 6 opening left and let me choose which one I wanted.I couldn't pass up the challenge of "What the Hex!"

My Project I can't take full credit for since I seen something like this on google search some time ago and have always wanted to try it and put my spin on it and this was my chance.  I Hope
you like it!


The papers I used was from DCWV The Black Current Stack , DCWV, Lemon Flower Stack AC Cardstock and a yellow plaid from my stash. I used my cameo to cut my HEXAGONS and shadows and Inked them in Gray. I used the butterfly Cut file from Little Scraps of Heaven Designs and used heat set studs to top them off. With some trial and error of how I wanted to lay out the card this is what I ended up with.

Thank you for joining me and Thank you Connie for Having me! Such an Honor! Please check out my fanpage  at:

Scrapping For Tranquility

and to put in your address book here is my blog address:

Scrapping for Tranquility

Have a blessed day!


Ps, if you are just happening by my blog please stop by :


She always has great inspiration and a challenge going on a wonder DT!  What a WONDERFUL lady she is!  Tell her Christi sent you!  :)