Thursday, December 28, 2017

Merry Sick-Mas

Hello Scrapping For Tranquility Fans!  Stopping in to share a layout I did of my youngest grandson, Lestat.  It was his first Christmas in 2015 and he was sooooo sick with an upper respiratory infection but he tried sooo hard to keep his spirits up just to open presents.  All he wanted to do was be held.  

With out further ado his my layout:


 I did follow a sketch by Pagemaps for this and here is the sketch:


I used AC Card stock throughout.  The paper piecing is from Little Scraps Of Heaven and the design is Vintage Snowman.  I used Jesse James Dress It Up Embellishments Snow by Create For Less and  a mix of Echo Park  , Bo Bunny and Various  other buttons in my stash.  I also used Totally White Trendy Bakers Twine and Sky Trendy Bakers Twine.  I then used Various Blue sequins in my stash to top it off.  

I hope you enjoyed my layout and thanks for stopping by!

Blessings,

Items I used from Trendy Twine


Items I used from Create For Less


Contests I would like to enter this in:

Wednesday, December 20, 2017

Cutting Cafe- Pie Box

Hi Folks! Four more days till Christmas!  Are you thinking what kind of goodies you are making for Christmas desert?  How about what you gong to send everyone home with a piece of that homemade pie with?  I have just the thing to do that with! 


This Yummy looking pie  box from The Cutting Cafe!

So Easy to make and you can make it look like any thing you want, Apple , Cherry, Pecan, Ect.   So many sentiments come with the set also!
I just happen to make mine The apple of  my eye!

Stop by the cutting Cafe and see all Regina's Fabulous Files!

Happy Holidays!


Friday, December 15, 2017

Trendy Twine-Guest Designer

Ten more days till Christmas !  (But, who is counting, right?)  Christi here with my last December's Guest Designer post for Trendy Twine .  I always love when Lesley and the gang at Trendy Twine grace me with this honor!  Who can't resist Trendy Twine's Bakers Twine????  I know it is on the top of my Christmas list!

For my last project  here in December, I want to share with you another Christmas card I made for a special friend.


I found something similar in a magazine , like my last post , but of course had to make this mine.

I started off with a white base folding it in half and putting a red Piece of AC Card stock on top of this .  I then pulled out my DCWV stack, Winter Solstice for the pattern snow flakes.  I Glued all three down together .  

I brought out my Nested , Stitched Circles from Pink and Main and laid them in the middle of the front of the card.  (making sure to not have the back of my card in the way.)  And ran it through my Big Shot to cut out the 3 inch circle.

Taking a 3 inch die and a 4 inch die I then cut out the frame to go around the circle. and set it aside for later.

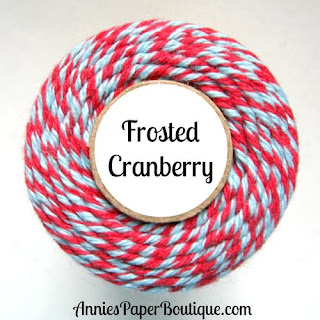
Cutting 5 , 3 1/2 inch pieces of Frosted Cranberry Trendy Twine, I proceeded to lay ATG Tape around the circle edge then stretching the twine from one side to the other .  Keeping the twine at the top of the circle close together and spread out at the bottom.
When the Twine was laid out I put the ATG tape over the top of the twine edges around the circle edges again to now lay the frame I cut out earlier.  I proceeded to put Glitter Glue around the frame and set aside to dry.
I cut out a 1 1/2 in circle and a shadow for my sentiment and picked out a sentiment from a stamp set I had in my stash.  Once my glitter glue was dry I glued my sentiment on at the bottom of my circle and made a bow out of my Frosted Cranberry Trendy Twine and draped it down the sides of my circle .  To finish it off, I added clear snowflakes and added red and blue bling to the centers to match my twine.

Here is what I used from Trendy Twine:


I hope you all have a VERY Merry Christmas and a VERY Happy New Year!

Blessings,


I have entered this in the following Challenges:
  

Friday, December 8, 2017

Trendy Twine Guest DT

Hello!  It's beginning to feel alot like Christmas!  :)  I am sooo lucky to be a Guest Designer again this holiday season over at the Trendy Twine Blog.

I want a share a card I made but I can't take full credit for it.  I found one similar in a crafting magazine and loved it.   I filed it up in my to do list and finally had a chance to make it.  Now I am sharing it with all you Trendy Twine fans!  

With out further ado :

Easy to make, You take and cut out a triangle (taller than wide) out of card stock.  Wrap it in double sided  tape.  I used Christmas Mint Trendy Twine to wrap closely together around the triangles to make the trees.  Decorate with Bling.  Tear Card stock for the mountains and I used Stickles for the snow tops.  You can make your card front any way you would like .  I then decorated with shaped buttons and bling.

Here is the what I used from Trendy Twine:


I hope you enjoyed my Christmas trees made from the Christmas Mint Trendy Twine.  Leave me a comment and let me know what you think!


Challenge entered:
Pink and Main:  Holiday Theme


Wednesday, December 6, 2017

Cutting Cafe-Christmas Photo Booth Props

Hello Scrapping For Tranquility Fans and Cutting Cafe Fans!  Christmas is getting near and everyone is gearing up for all those Christmas parties.  My youngest daughter has a group of friends that they have been friends since they were wee ones and now that they are all grown and married with their own wee ones, they have an annual Christmas get together .

I thought for their get together ,this Saturday, it would be fun to set up a Christmas photo booth with photo props for them.  Now how fun will that be????  They haven't taken a lot of pictures together since high school when they were called , (ready for this)  the "rubber ducky clan"!  So , here is what I made them from The Cutting Cafe


First I started with the file Christmas Photo Booth Props Cutting Files.  I made the Santa group up Using all AC Card stock.  Highlighting with Nuvo Drops and a white gel pen, I made the HOHOHO, Square glasses , Santa Hat and white beard and mustache. 


Here I made the Snowman set props with AC Card stock.  I accented with Nuvo drops, Stickles and black and white gel pens on the pipe, Carrot, top hat, bow tie and round glasses.


Here is what I call the Kiss me set .  I used Glossy Accents to make my lips look like they have lip gloss on them and Used Stickles  on the holly and Kiss me to accent.


The decorations I used Foil card stock along with Nuvo drops to highlight them.


2 different mustaches are included in the set.


Reindeer nose and antlers are also included which I made into Rudolph !

  Last but not least but a beautiful snowflake!  I again used Stickles to highlight this!

WOW!  There is a lot included in this set of cutting files!  But boy will the "rubber duckies" have fun this Saturday in their photo booth and make lots of memories!

Thanks for joining me for another Cutting Cafe post and leave me a message and let me know what you think!

Blessings,


Monday, November 20, 2017

Cutting Cafe -DT Project- Tissue Box Cover

Hello!  Can you believe it is the week of Thanksgiving?  Where does time go?

I am here to share my 21st of the month Cutting Cafe DT project with you!  This time we did the wonderful Tissue Box Cover.  This is how I decorated mine:


My Grandson, Lestat's bedroom is done in Winnie the Pooh so I wanted to match his room.  The first two sides say " Lestat's Pooh...


and the second two sides say "AhChoo Box."  Due to the colors it was hard to get a picture of it.  

I used AC Cardstock for all the colors and the SVG files were from a Facebook group.  

I hope you enjoyed my project .  Please leave me a comment and let me know what you think!

Have a Blessed Thanksgiving!


Friday, November 17, 2017

Guest Designer for Miss Kate's Cuttables

Hello!  Christi from Scrapping For Tranquility here!  I am stopping in to share my Guest design post for Miss Kate's Cuttables.  I just love her files!  

Here is what I made:


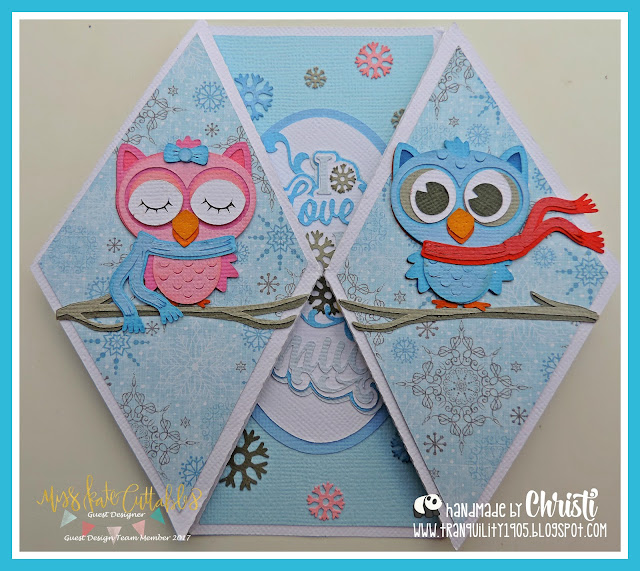
I made a Diamond Fold card with the files I Love you Snow MuchWinter Owl and Girl-Winter Owl.  I just fell in love with these little winter owls as soon as I seen them.  I thought they made a "perfect couple". 


Here is the Diamond Fold Card in the open position.  
This is where I put the "I Love you Snow Much " sentiment.  I also made extra snowflakes that came with the files to decorate the card.

I used AC Cardstock for all my solids and I used DCWV , The Winter Solstice Stack for the Pattern paper.

I hope you enjoyed my post today and will leave me a comment!  I love to hear what you think!

Blessings,


Tuesday, November 7, 2017

Welcome to the Neighborhood

Hello!  Wanting to share my Cutting Cafe project.

I used the file Welcome To the Neighborhood Scene Card .  I put it on a white card base .(AC CARDSTOCK)  and then also used DCWV loose paper for the printed paper.  

This card is great for a first time home buyer or a new neighbor.  Love this card!


Thanks for joining me!  


Blessings,


Sunday, November 5, 2017

Christmas Parade Layout

Hello Scraping Tranquility Fans!  I wanted to stop in and share a layout I made for our towns 2015 Christmas Parade.  I am using the sketch for Lets Scrap Challenge and here it is:


When I seen the layout I knew exactly what I wanted to scrap with it.  Without further ado here is what I created:


I started with White AC Cardstock as my base and then I chose my all time favorite stack company, DCWV and used their Holiday Cheer Stack to make my octagons and banners.  It is such a fun stack.

 Here is a close up of the right side .


Here is a close up of the left side.

I made the title in Scal 4 on my cameo 3 and did word journaling for the bullet journaling in the top right corner and called it a day.

I hope you enjoy my layout as much as I enjoyed making it.

I am entering it in the Lets Scrap Sketches Challenges.

Blessings,

Christi 


Monday, October 16, 2017

Guest DT - Connie Can Crop-Sponsored By Dreaming Tree

Hello!  Christi here from Scrapping For Tranquility, this months Guest DT.  I am VERY honored Connie is having me back again.  I want to thank you for joining me here at Connie Can Crop this month for this months Challenge of:

Our sponsor this month for To Die For is :


What a great sponsor huh???

I want to share with you what I made from dreaming tree with my die cuts:


The Chilling Chandelier by Dreaming Tree.
This was sooo fun to make!

It has bats around the top with vellum windows around it which I put battery operated lights inside to light it up.


It then has a large spider and bats that hang from it.


I used glittered paper for the bats and spider .


You can make them any colors you want but I made mine Purple , Black and Green.  My daughter was married on Halloween and these were her wedding colors.


Halloween is her favorite holiday .


 I wanted to make her something special to hang in her house for the holiday.

She loved it!

Thank you for joining me and hope you enjoyed my project.

Blessings,


Challeges entered
Connie Can Crop: To Die For